Registration Desk
Use the Registration Desk feature in Varyshop Events to grant access to registered event attendees as they arrive, and store attendee-related data in the reporting metrics.
Registration Desk page
On a mobile device (on the Varyshop app or in a browser), open the Events app, and click the "Registration Desk" to view the "Registration Desk" page.
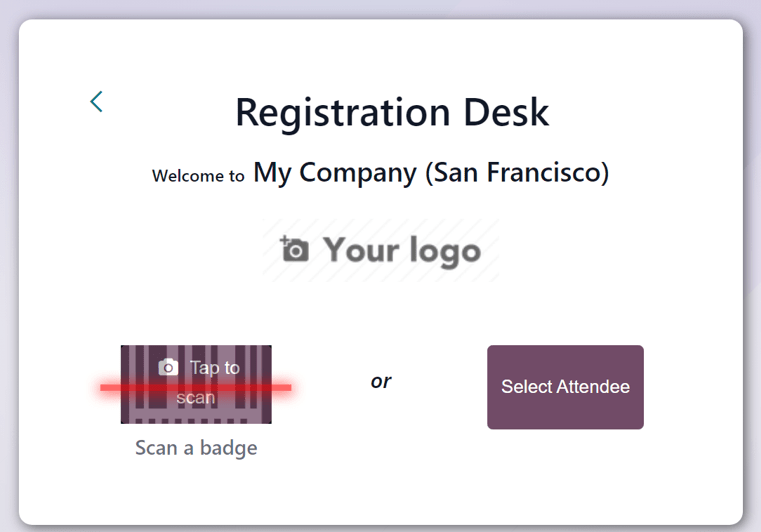
At the bottom of the "Registration Desk" box, there are options to either "Scan a badge" or "Select Attendee".
Scan a badge
Scan the codes present on event attendee badges, by navigating to Events app > Registration Desk, and selecting the "Scan a badge" option.
Important: Varyshop must be granted access to the camera being used for the "Scan a badge" option to work.
Once Varyshop has access to the camera, a "Barcode Scanner" pop-up window appears, showing the camera's point-of-view. There is also a specified view finder box present, whose size can be manually modified, accordingly, using the "(crop)" icon.
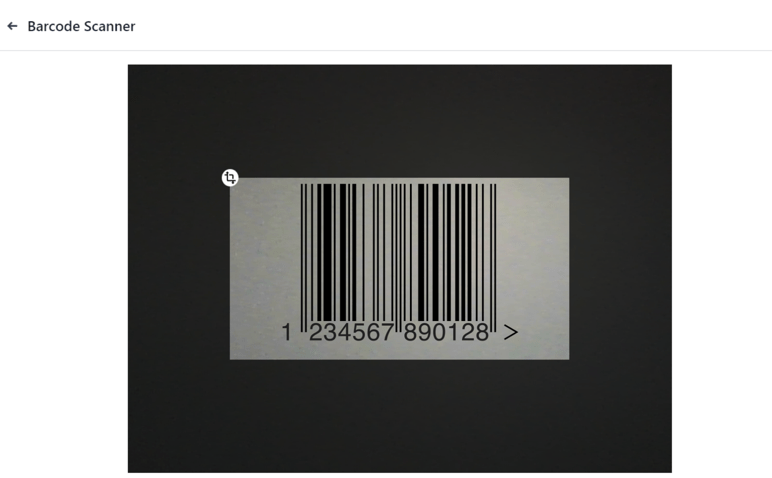
When the badge code is in the middle of the view finder box, the code is scanned, the "Barcode Scanner" pop-up window disappears, and the attendee is granted access to the event. Once the code is scanned, their attendance is logged in the Varyshop Events app.
If the barcode being scanned is invalid, an error pop-up message appears in the upper-right corner.
Select attendee
Manually grant access to event attendees, by navigating to Events app > Registration Desk, and selecting the "Select Attendee" option.
Varyshop reveals an "Attendees" page, with all the attendees for every event in the database, in a default "(Kanban)" view.
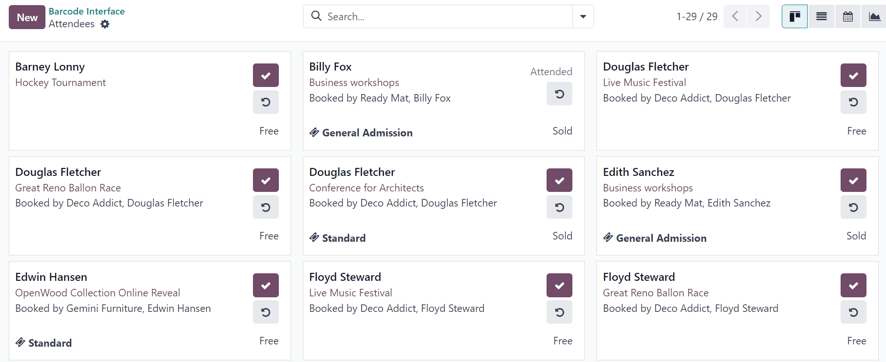
On the "Attendees" page, each attendee card displays that person's name, which event they are registered to attend, their associated company (if applicable), what ticket tier they purchased (if applicable), along with two buttons: a "(checkmark)" and "(counter-clockwise arrow)".
To grant access to a person, marking them as attended, click the "(checkmark)" button on that attendee's card.
Click the "(counter-clockwise arrow)" button on an attendee's card to undo the previous action.
Tip: It is recommended to use an event-specific filter on the "Attendees" page, via the search bar drop-down menu.
To do that, click the "(down arrow)" beside the seach bar to reveal a drop-down menu with "Filters", "Group By", and "Favorites" options.
For example, click the "Event" option, in the "Group By" column. Then, click away to remove the drop-down menu. Varyshop reveals the "Attendees" page with event-specific columns, allowing users to locate specific event attendees.